Wednesday, August 22, 2012

{flower} power

as i've been looking through websites for various things, I came across the most adorable idea for an edible decoration.... 
the cupcake bouquet.


this would make for the perfect centerpiece to any table for a baby shower, wedding shower, holiday party, or any social gathering. I know that if I went to a party and there was this marvelous creation adorning the middle of the table, I would immediately compliment the host for the their creativity!

i'm thinking of doing this for some event, but I'm just not sure of what yet. now, onto how to accomplish this lovely baking craft. for the novice baker, this looks pretty easy to me. I think the hardest part will be the icing technique to make the cupcakes look like roses, or a flower at all. if all fails, you could use other techniques (which i'll show picture of later in the post) to give the feel of a "flower".

THINGS YOU MAY NEED:

In many different tutorials, the shape of the Styrofoam may change. Use whatever you feel will work the best for the container you are putting the cupcakes into.


Below is a tutorial that might help you along in your quest for the perfect cupcake bouquet!


IF ATTEMPTING THE ROSE ICING TECHNIQUE IS NOT WORKING, TRY SOME OF THESE IDEAS:

here is a tutorial on how to make hydrangea cupcakes - quick & easy!!


Thursday, August 16, 2012

{DIY} Calligraphy

calligraphy is a beautiful skill that I should try to acquire. however, i'm sure my perfectionism would cause me great heartache when I saw my finished product. as promised, I have a very nice, elegant solution to using a calligraphy and creating the looks below for your wedding invitations or your next event.


not only do I have one, but THREE solutions for you! any of these could be accomplished my anyone.

1. Fake Calligraphy

this fantastic step by step tutorial shows you how to do calligraphy the old fashioned way. it seems so easy, and at first I didn't believe it could be that easy. I grabbed a gel pen and gave it a go, and wouldn't you know, I had a decent looking product!
 2. Trace your heart out!

if only I had an old Lite-Brite, I could just start zipping through these envelopes. this great tutorial shows your how to use a trace table, and a computer print out to create your look. this project lends itself to using so many different fonts, and definitely offers consistency of the lettering and sizing that may not be accomplished with free-hand calligraphy.

3. Print & Trace

hopefully your screen can allow you to see the clever way to achieve that calligraphy look, without needing the tracing table. by printing onto the envelope, or other paper, in a color just slightly lighter, you can see the font, and trace. this even works on white/ivory paper. choose a really light version of the ink color that you are going to use. since this requires you to use a printer, it is very similar to the option above, but cuts out a step.

-OR-
if your are still feeling like calligraphy is more than  you can tackle
as I mentioned in my last blog post, I had dreamed of having a wrap around address label for my wedding invitations. there were so many beautiful examples that I had seen, and I was really hoping to pull this off for my own invitations. this solution is a great way to step away from the look of a simple Avery address label, and into a more classy way of easily address so many envelopes. of course Martha has a great tutorial on how to accomplish this on your own! even as I write this blog, i'm drawn back into the loveliness of these designs.

photo courtesy of Etsy Shop: DigitalBunnyDesigns

Belletristics

photo: Seeing Designs  from  Blush Printables


Tuesday, August 14, 2012

signed, sealed, delivered

wow, have I been a slacker! I haven't posted since last Thursday! I have been in full force gathering all my supplies for all the wedding crafts I have signed myself up for! as the summer winds down, I realize that there are only a few months before the holidays when the real wedding coordination will take place. so I've decided to bite the bullet and start hoarding these projects. more blog posts will come with some of the final products! I can't wait to share, hopefully they turn out great.

over the weekend, I had a chance to catch up with a friend of mine who is getting married too. as we ran through the lists of things we need to accomplish, compared notes, and organized our thoughts, we started talking stationary. stationary has been on my mind since I got engaged. of course there are the invitations, but there is always so much more to think about: save-the-dates, thank yous, rehearsal invites, shower invites, monograms & such to tie it all together.

I've purchased all of my thank-yous already, and used Vistaprint. I had a Groupon to use with them, and I had never used them before. Considering the amount of products they offer, I was a little skeptical of how the cards would turn out, but they looked great! The great thing about Vistaprint is that they are fast, and very affordable, and we know I'm always looking for a deal! Below are a few cute cards I like, but didn't use myself.

among some of my other purchases, I also managed to an adorable self-inking stamp from Wedding Paper Divas. I had dreamed of doing a wrap around label on the wedding invitations, but decided that is may not be practical for me. I still wanted something personal, and have been looking at monogrammed/custom stamps for quite some time. luckily WPD had a sale, and I snagged this beauty below. I will use this on my outer and inner envelopes for the invitations. best part is that I decided to not put our last name so that we can use this before and after the wedding!

  even if you aren't getting married, there are many adorable return address stamps that you can snatch up for a little added flavor to that birthday card, or mortgage payment envelope:


there will definitely be more to come involving this topic. stay tuned for a DIY solution to addressing all those envelopes!


Thursday, August 9, 2012

{skinny}tails

with the weekend fast approaching, my mind starts heading to what activities are on the calendar. while I play law school widow for the next two weeks while my fiance studies and takes this semester's exams, I'll be heading to hang out with our friends at a bonfire. as with most social activities, I'm sure there will be a few alcoholic drinks consumed. this got me to think: what can I drink that is tasty, easy to make, and low in calories? I've recently been logging all my food & beverages on MyFitnessPal, and I don't want to have to log a 300 calorie drink, 5 times :)

so, I turn to my trusty source of all things: Google. I am looking for a drink that doesn't involve 10 different ingredients and pretty easy to prepare. while it's still summer, I thought I would share a few cocktails that won't break our diets!

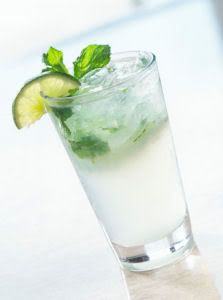
Cuban Mojito: Skinny Taste 
  • 1.5 oz Bacardi Rum
  • 12 fresh spearmint leaves
  • 1/2 lime
  • 7 oz sprite zero or club soda
  • 2 tbsp. splenda
in a cool tall glass, muddle the mint, Splenda and lime juice. add crushed ice. add rum, soda and stir well. garnish with a lime wedge and a few sprigs of mint. serve with a straw. 
 
 Mimosa: Everyday Health
  • 2 ounces Minute Maid light orange juice beverage
  • 4 ounces champagne
  • Juice of 1/2 medium-size orange, or 1 to 2 ounces
squeeze juice from the orange half into a glass filled with ice. pour in light Minute Maid juice followed by champagne. stir. garnish with fresh orange slices for a dash of style.

just slice up 4 apples and 3 oranges. combine fruit with 1 pound red grapes, halved; 3 bottles light- to medium-bodied red wine; 1 can Fresca (or any diet lemon soda); and 1 can club soda. chill mixture, and serve over ice for 16 servings of scrumptiousness. Here’s the best part: Each serving has only 173 calories!
 
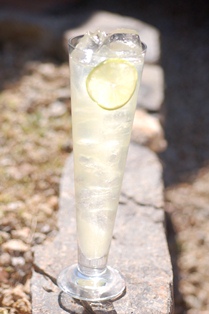
Skinny Margarita: She Knows
  • 2 ounces silver tequila 
  • 1 1/2 ounces lime juice (freshly squeezed) 
  • 1 ounce agave nectar
substitute agave nectar with a sugar-free sweetener to make this drink only 140 calories (with: 220 calories)

the easiest way to accomplish an easy skinny cocktail is to check out the line of SkinnyGirl products by Bethanny Frankel. I have tried the margarita, and it isn't half bad. I guess for 100 calories per serving, I can't really be asking for much. Luckily, there are more than the margarita to sample, and liquor too!


I'm certain that there is at least one drink that I should be able to make that I find tasty, strong, and I won't need to run 5 miles to make up for! If anyone has any suggestions on recipes to try, please comment!


Tuesday, August 7, 2012

a {kale}thy snack

i've heard so much about kale, and all the nutritional benefits that it has to offer. as with anything that is good for you, i'm a little skeptical. I really don't know anything about the vegetable, so I had no idea how to introduce myself to this great source of vitamins and minerals. I should also mention that on top of it's wonderful benefits, it is cheap!

while Facebooking one day, a page came up that caught my eye. Eat Yourself Skinny is a blog dedicated to eating healthy, and has recipes for healthy alternatives to your favorite foods. I tried a recipe for Funfetti Cake Dip, which was so amazing, and my fiance was even impressed with it's tastiness! so I decided to give another recipe a chance, and that's when I saw the recipe for Kale Chips.


I always love to find recipes that even I can tackle, as I am not a cook whatsoever. this recipe is incredibly easy, and takes about 25 minutes from prep to finish. once these chips were finished, I was still apprehensive about this magical veggie. once I put one of those crispy pieces in my mouth, I was in love!
ENJOY!

Things You Need:
  • Kale
  • Sea Salt 
  • Olive Oil

Preheat oven to 350 degrees. Wash & dry the kale bunch.
Remove spines from each piece.
Break the kale into 2 inch pieces.
Place the pieces in a bowl, and mix with one tablespoon of olive oil.
Place the pieces on a baking sheet and sprinkle with sea salt.
Bake in the oven for 20 minutes, or until crispy.


{eye} love eye primer

as I was getting ready this morning, and putting on my makeup, I had a moment where I was truly thankful...for my discovery of eye primer!

once upon a time, I was standing up in a wedding. as any bridesmaid knows, hair & makeup can be an expense. for this specific occasion, I decided to try my hand at doing my own makeup, smokey eye and all! you should know that I am not a makeup artist, nor did I have any real talent for applying makeup. of course I could do the standard foundation, blush, eyeshadow, eyeliner and mascara, but there was no technique for any of it.

for anyone interested in trying to do their own makeup, definitely head over to youtube or pinterest to find great step-by-step tutorials on how to achieve any technique. for me, this was very helpful to see what tools and products I needed to achieve the look of a professional makeup application. I found pinterest to be the most helpful in seeing the final product, and then taking me to the video, wherever it was hosted.

after acting like a 5 year old in my mother's makeup for a couple of weeks, I felt like I was finally ready to buys the proper tools & makeup for this experiment. from all of the videos, it seemed that eye primer was a very important part of the process to prep the eye, and keep the shadows in place. So, I headed into Ulta to browse the selections. my first choice for advice on makeup is heading to Sephora as I just personally have had great success with the products I have taken recommendations on. either way, the prices are about the same.

so I asked the girl wandering around with pounds of makeup on, what she recommended for an eye primer. She told me that her favorite was Urban Decay Eye Primer ($20), so I picked it up.
as I browsed the selections, I came across some shadow that I thought would work perfectly, Starry Eyed Baked Eye Shadow Trio ($26).

this trio has a bit of a shimmer, and can be used wet or dry. As I continued to fall in love with all the products, I noticed this kit, that contained everything I could possibly need, Close Up: Real Life to Red Carpet Eye Tutorial ($37)

here I had everything I could need at my finger tips: eyeshadow, eye primer, mascara, liquid eyeliner, a makeup brush, and a step-by-step book on how to accomplish several different looks! I picked this up too, and headed home to try my hands at a smokey eye.

as with anything, practice makes perfect, and it took me a few tries to accomplish, but I started to get the hang of it. the wedding day came around, and the true test of my practice needed to pay off. I had to say I was pretty pleased. as I looked around, I couldn't tell that I had done my makeup myself. I felt a sense of accomplishment.

I had another wedding a month later, and I tried the technique again, and with another successful attempt. I was pleased at how professional the look ended up being, and I had spent a fraction of the cost for the professional services. the shadow lasts through the event, and does not smudge or leave creases. over the months, I have continued to practice and experiment. I receive many compliments on the shadow, and because of that, I have purchased more Lorac goods to replace the originals. while I normally am quite thrifty, these products are worth the money, and last for quite a long time.

to swing back to this morning, I use the eye primer by Lorac every day. however, I don't wear shadow every day. during the week I prefer a more natural look, and don't wear eye makeup. in the past, I would wear shadow because my eyelids would be more red, or would appear shiny compared to my skin that had foundation. to mask this, I tried putting foundation on my lids. this worked, but by the end of the day, the oils from my lids would wash the foundation away. this is when I decided to give that lovely primer I used for weekends and special occasions to good use. the primer is relatively skin colored, which creates a very natural appearance.

image from today, a random tuesday, with a sun burnt eyelid to boot.

now again, I am not a makeup artist, so this is why I share this with you. a simple product can be easy to use, at any skill level, and give you a very finished look. eye primer brought me joy this morning, and I'm hoping that if you aren't using it already, it can bring joy to you too!


Friday, August 3, 2012

{shoe}ly possessed

since my dress came in a few weeks ago, I have had the task of finding the shoes to wear with this dress. one of my first posts was about these amazing Sergio Rossi shoes that I had wanted, but were $1600! I loved the uniqueness of the shoe, and was hoping to find something similar.
on my lunch hour today, I decided to step into my local DSW to see what deals I could find for cute shoes on the clearance racks. sadly, nothing sparked my interest so I headed for the door. I decided to head up the aisle where the special occasion shoes are located, just to browse and see if there was anything that caught my eye.

and there they were...


lulu townsend - vada 
$69.95

while these shoes are not the Sergio Rossi's, the scaling is quite similar, and 96% off the price! these pictures don't actually do the rhinestone justice for how sparkly they are in real like. the front of the show hardly looks like it has color, and looks like it's made out of glorious diamonds! if you can't tell, I was very please with my find!

i'm not certain these shoes are the ones, but they are the ones for right now! I cannot wait to get home, and try them on to see how they look!


Thursday, August 2, 2012

{guest} of honor

remembering your guests, and the special place that they held in your heart on your wedding day is priceless. Simply writing your name in a book, doesn't seem to cut it for the bride of today. with the availability of the internet, and an abundance of creativity, there are so many wonderful options for a bride to choose from. I have seen so many amazing ideas for guestbooks for a wedding. I remember going to my friend's wedding and it was the first time that I saw the tree with the guest's fingerprints.

photo courtesy of Etsy

if my friend hadn't used this fabulous idea for her wedding, I would have loved this idea. I love the idea of seeing the fingerprints of your guests, and having a beautiful piece of artwork after the big day. as I searched for a unique idea for our wedding, I stumbled across many great ideas that I loved and wanted to share.

photo courtesy of Emmaline Bride
the possibilites are endless for the font & style of the letter. I love that this is simple, and could immediately be hung in your home after the wedding.

photo courtesy of Wedding Bee
the wish tree allows your guests to write a special message to you, for you to keep and read for years to come
http://www.historicfloridawedding.com/2011/08/03/green-nature-themed-wedding-laura-nate-outdoor-florida-weddings/picture6/
photo courtesy of Florida Historic Weddings
this is such a sweet way to display messages from your guests. this would be perfect for a beach wedding. this guestbook idea could easily be transported from the reception to your mantel or coffee table!

photo courtesy of Etsy Shop: LoveFromTheThumb

this is another take on the fingerprint guestbooks. the great thing about this type is the personalization that each guest offerse with their unique fingerprint.


photo courtesy of Daisy Days

these examples could be done by ordering from a shop, or could easily designed and printed on your home computer! an idea like this could tie together the designs you have used for your save-the-dates, and invitations. Simply creating a beautiful monogram of your intitals could be beautifully placed in your new married home!


this is my favorite, mostly because I will be using this at my wedding. I will replace the box with something with a lid, and have our wedding date on the outside. i'm so excited to see the messages that my family and friends write, and I can share these with my children some day!